Extraire du texte d'images dans des fichiers PDF avec Python
De nos jours, les entreprises de moyenne et grande taille utilisent quotidiennement des quantités massives de documents imprimés. Parmi eux se trouvent des factures, des reçus, des documents d'entreprise, des rapports et des communiqués de presse.
Pour ces entreprises, l'utilisation d'un scanner OCR peut faire gagner un temps considérable tout en améliorant l'efficacité et la précision.
Les algorithmes de reconnaissance optique de caractères (OCR) permettent aux ordinateurs d'analyser automatiquement les documents imprimés ou manuscrits et de préparer les données textuelles dans des formats modifiables pour que les ordinateurs puissent les traiter efficacement. Les systèmes OCR transforment une image bidimensionnelle de texte pouvant contenir du texte imprimé par machine ou manuscrit à partir de sa représentation d'image en texte lisible par machine.
Généralement, un moteur OCR implique plusieurs étapes nécessaires pour former un algorithme d'apprentissage automatique pour une résolution efficace des problèmes à l'aide de la reconnaissance optique des caractères.
Les étapes suivantes qui peuvent différer d'un moteur à l'autre sont grosso modo nécessaires pour aborder la reconnaissance automatique des caractères :
Dans ce tutoriel, je vais vous montrer ce qui suit :
- Comment exécuter un scanner OCR sur un fichier image.
- Comment biffer ou surligner un texte spécifique dans un fichier image.
- Comment exécuter un scanner OCR sur un fichier PDF ou une collection de fichiers PDF.
Veuillez noter que ce didacticiel concerne l'extraction de texte à partir d'images dans des documents PDF.
Pour commencer, nous devons utiliser les bibliothèques suivantes :
Tesseract OCR : est un moteur de reconnaissance de texte open source disponible sous la licence Apache 2.0 et son développement est sponsorisé par Google depuis 2006. En 2006, Tesseract était considéré comme l'un des moteurs OCR open source les plus précis. Vous pouvez l'utiliser directement ou utiliser l'API pour extraire le texte imprimé des images. La meilleure partie est qu'il prend en charge une grande variété de langues.
L'installation du moteur Tesseract sort du cadre de cet article. Cependant, vous devez suivre le guide d'installation officiel de Tesseract pour l'installer sur votre système d'exploitation.
Pour valider la configuration de Tesseract, veuillez exécuter la commande suivante et vérifier la sortie générée :
 Python-tesseract : est un wrapper Python pour le moteur Tesseract-OCR de Google. Il est également utile en tant que script d'invocation autonome pour tesseract, car il peut lire tous les types d'images pris en charge par les bibliothèques d'imagerie Pillow et Leptonica, y compris jpeg, png, gif, bmp, tiff et autres.
OpenCV : est une bibliothèque open-source Python, pour la vision par ordinateur, l'apprentissage automatique et le traitement d'images. OpenCV prend en charge une grande variété de langages de programmation comme Python, C++, Java, etc. Il peut traiter des images et des vidéos pour identifier des objets, des visages ou même l'écriture manuscrite d'un humain.
PyMuPDF : MuPDF est une solution d'interpréteur PDF, XPS et eBook hautement polyvalente et personnalisable qui peut être utilisée dans un large éventail d'applications en tant que moteur de rendu PDF, visualiseur ou boîte à outils. PyMuPDF est une liaison Python pour MuPDF. Il s'agit d'un visualiseur PDF et XPS léger.
Numpy : est un package de traitement de tableau à usage général. Il fournit un objet tableau multidimensionnel hautes performances et des outils pour travailler avec ces tableaux. C'est le package fondamental pour le calcul scientifique avec Python. En outre, Numpy peut également être utilisé comme un conteneur multidimensionnel efficace de données génériques.
Oreiller : est construit au-dessus de PIL (Python Image Library). C'est un module essentiel pour le traitement d'images en Python.
Pandas : est une bibliothèque Python open source sous licence BSD fournissant des structures de données et des outils d'analyse de données hautes performances et faciles à utiliser pour le langage de programmation Python.
Type de fichier : package Python petit et sans dépendance pour déduire le type de fichier et le type MIME.
Ce didacticiel vise à développer un utilitaire léger basé sur la ligne de commande pour extraire, rédiger ou surligner un texte inclus dans une image ou un fichier PDF numérisé, ou dans un dossier contenant une collection de fichiers PDF.
Installer
Pour commencer, installons la configuration requise :
$ pip install Filetype==1.0.7 numpy==1.19.4 opencv-python==4.4.0.46 pandas==1.1.4 Pillow==8.0.1 PyMuPDF==1.18.9 pytesseract==0.3.7
Commençons par importer les bibliothèques nécessaires :
import os
import re
import argparse
import pytesseract
from pytesseract import Output
import cv2
import numpy as np
import fitz
from io import BytesIO
from PIL import Image
import pandas as pd
import filetype

# Path Of The Tesseract OCR engine
TESSERACT_PATH = "C:\Program Files\Tesseract-OCR\tesseract.exe"
# Include tesseract executable
pytesseract.pytesseract.tesseract_cmd = TESSERACT_PATHTESSERACT_PATHest l'endroit où se trouve l'exécutable Tesseract. Évidemment, vous devez le changer pour votre cas.
def pix2np(pix):
    """
    Converts a pixmap buffer into a numpy array
    """
    # pix.samples = sequence of bytes of the image pixels like RGBA
    #pix.h = height in pixels
    #pix.w = width in pixels
    # pix.n = number of components per pixel (depends on the colorspace and alpha)
    im = np.frombuffer(pix.samples, dtype=np.uint8).reshape(
        pix.h, pix.w, pix.n)
    try:
        im = np.ascontiguousarray(im[..., [2, 1, 0]])  # RGB To BGR
    except IndexError:
        # Convert Gray to RGB
        im = cv2.cvtColor(im, cv2.COLOR_GRAY2RGB)
        im = np.ascontiguousarray(im[..., [2, 1, 0]])  # RGB To BGR
    return im
Cette fonction convertit un tampon pixmap représentant une capture d'écran prise à l'aide de la bibliothèque PyMuPDF en un tableau NumPy.
Pour améliorer la précision de Tesseract, définissons quelques fonctions de prétraitement à l'aide d'OpenCV :
# Image Pre-Processing Functions to improve output accurracy
# Convert to grayscale
def grayscale(img):
    return cv2.cvtColor(img, cv2.COLOR_BGR2GRAY)

# Remove noise
def remove_noise(img):
    return cv2.medianBlur(img, 5)

# Thresholding
def threshold(img):
    # return cv2.threshold(img, 0, 255, cv2.THRESH_BINARY + cv2.THRESH_OTSU)[1]
    return cv2.threshold(img, 0, 255, cv2.THRESH_BINARY | cv2.THRESH_OTSU)[1]

# dilation
def dilate(img):
    kernel = np.ones((5, 5), np.uint8)
    return cv2.dilate(img, kernel, iterations=1)

# erosion
def erode(img):
    kernel = np.ones((5, 5), np.uint8)
    return cv2.erode(img, kernel, iterations=1)

# opening -- erosion followed by a dilation
def opening(img):
    kernel = np.ones((5, 5), np.uint8)
    return cv2.morphologyEx(img, cv2.MORPH_OPEN, kernel)

# canny edge detection
def canny(img):
    return cv2.Canny(img, 100, 200)

# skew correction
def deskew(img):
    coords = np.column_stack(np.where(img > 0))
    angle = cv2.minAreaRect(coords)[-1]
    if angle < -45:
        angle = -(90 + angle)
    else:
        angle = -angle
    (h, w) = img.shape[:2]
    center = (w//2, h//2)
    M = cv2.getRotationMatrix2D(center, angle, 1.0)
    rotated = cv2.warpAffine(
        img, M, (w, h), flags=cv2.INTER_CUBIC, borderMode=cv2.BORDER_REPLICATE)
    return rotated

# template matching
def match_template(img, template):
    return cv2.matchTemplate(img, template, cv2.TM_CCOEFF_NORMED)

def convert_img2bin(img):
    """
    Pre-processes the image and generates a binary output
    """
    # Convert the image into a grayscale image
    output_img = grayscale(img)
    # Invert the grayscale image by flipping pixel values.
    # All pixels that are grater than 0 are set to 0 and all pixels that are = to 0 are set to 255
    output_img = cv2.bitwise_not(output_img)
    # Converting image to binary by Thresholding in order to show a clear separation between white and blacl pixels.
    output_img = threshold(output_img)
    return output_img
Nous avons défini des fonctions pour de nombreuses tâches de prétraitement, notamment la conversion d'images en niveaux de gris, l'inversion des valeurs de pixels, la séparation des pixels blancs et noirs, et bien plus encore.
Ensuite, définissons une fonction pour afficher une image :
def display_img(title, img):
    """Displays an image on screen and maintains the output until the user presses a key"""
    cv2.namedWindow('img', cv2.WINDOW_NORMAL)
    cv2.setWindowTitle('img', title)
    cv2.resizeWindow('img', 1200, 900)
    # Display Image on screen
    cv2.imshow('img', img)
    # Mantain output until user presses a key
    cv2.waitKey(0)
    # Destroy windows when user presses a key
    cv2.destroyAllWindows()
La display_img()fonction affiche à l'écran une image dans une fenêtre dont le titre est titleparamétré et maintient cette fenêtre ouverte jusqu'à ce que l'utilisateur appuie sur une touche du clavier.
def generate_ss_text(ss_details):
    """Loops through the captured text of an image and arranges this text line by line.
    This function depends on the image layout."""
    # Arrange the captured text after scanning the page
    parse_text = []
    word_list = []
    last_word = ''
    # Loop through the captured text of the entire page
    for word in ss_details['text']:
        # If the word captured is not empty
        if word != '':
            # Add it to the line word list
            word_list.append(word)
            last_word = word
        if (last_word != '' and word == '') or (word == ss_details['text'][-1]):
            parse_text.append(word_list)
            word_list = []
    return parse_text
La fonction ci-dessus parcourt le texte capturé d'une image et organise le texte saisi ligne par ligne. Cela dépend de la disposition de l'image et peut nécessiter des ajustements pour certains formats d'image.
Ensuite, définissons une fonction pour rechercher du texte à l'aide d'expressions régulières :
def search_for_text(ss_details, search_str):
    """Search for the search string within the image content"""
    # Find all matches within one page
    results = re.findall(search_str, ss_details['text'], re.IGNORECASE)
    # In case multiple matches within one page
    for result in results:
        yield result
Nous utiliserons cette fonction pour rechercher un texte spécifique dans le contenu saisi d'une image. Il renvoie un générateur des correspondances trouvées.
def save_page_content(pdfContent, page_id, page_data):
    """Appends the content of a scanned page, line by line, to a pandas DataFrame."""
    if page_data:
        for idx, line in enumerate(page_data, 1):
            line = ' '.join(line)
            pdfContent = pdfContent.append(
                {'page': page_id, 'line_id': idx, 'line': line}, ignore_index=True
            )
return pdfContentsave_page_content()La fonction ajoute le contenu saisi d'une image ligne par ligne après l'avoir numérisée à la trame de pdfContentdonnées pandas.
Créons maintenant une fonction pour enregistrer la trame de données résultante dans un fichier CSV :
def save_file_content(pdfContent, input_file):
    """Outputs the content of the pandas DataFrame to a CSV file having the same path as the input_file
    but with different extension (.csv)"""
    content_file = os.path.join(os.path.dirname(input_file), os.path.splitext(
        os.path.basename(input_file))[0] + ".csv")
    pdfContent.to_csv(content_file, sep=',', index=False)
    return content_file
Ensuite, écrivons une fonction qui calcule le score de confiance du texte extrait de l'image numérisée :
def calculate_ss_confidence(ss_details: dict):
    """Calculate the confidence score of the text grabbed from the scanned image."""
    # page_num  --> Page number of the detected text or item
    # block_num --> Block number of the detected text or item
    # par_num   --> Paragraph number of the detected text or item
    # line_num  --> Line number of the detected text or item
    # Convert the dict to dataFrame
    df = pd.DataFrame.from_dict(ss_details)
    # Convert the field conf (confidence) to numeric
    df['conf'] = pd.to_numeric(df['conf'], errors='coerce')
    # Elliminate records with negative confidence
    df = df[df.conf != -1]
    # Calculate the mean confidence by page
    conf = df.groupby(['page_num'])['conf'].mean().tolist()
    return conf[0]
Aller à la fonction principale : numérisation de l'image :
def ocr_img(
        img: np.array, input_file: str, search_str: str,
        highlight_readable_text: bool = False, action: str = 'Highlight',
        show_comparison: bool = False, generate_output: bool = True):
    """Scans an image buffer or an image file.
    Pre-processes the image.
    Calls the Tesseract engine with pre-defined parameters.
    Calculates the confidence score of the image grabbed content.
    Draws a green rectangle around readable text items having a confidence score > 30.
    Searches for a specific text.
    Highlight or redact found matches of the searched text.
    Displays a window showing readable text fields or the highlighted or redacted text.
    Generates the text content of the image.
    Prints a summary to the console."""
    # If image source file is inputted as a parameter
    if input_file:
        # Reading image using opencv
        img = cv2.imread(input_file)
    # Preserve a copy of this image for comparison purposes
    initial_img = img.copy()
    highlighted_img = img.copy()
    # Convert image to binary
    bin_img = convert_img2bin(img)
    # Calling Tesseract
    # Tesseract Configuration parameters
    # oem --> OCR engine mode = 3 >> Legacy + LSTM mode only (LSTM neutral net mode works the best)
    # psm --> page segmentation mode = 6 >> Assume as single uniform block of text (How a page of text can be analyzed)
    config_param = r'--oem 3 --psm 6'
    # Feeding image to tesseract
    details = pytesseract.image_to_data(
        bin_img, output_type=Output.DICT, config=config_param, lang='eng')
    # The details dictionary contains the information of the input image
    # such as detected text, region, position, information, height, width, confidence score.
    ss_confidence = calculate_ss_confidence(details)
    boxed_img = None
    # Total readable items
    ss_readable_items = 0
    # Total matches found
    ss_matches = 0
    for seq in range(len(details['text'])):
        # Consider only text fields with confidence score > 30 (text is readable)
        if float(details['conf'][seq]) > 30.0:
            ss_readable_items += 1
            # Draws a green rectangle around readable text items having a confidence score > 30
            if highlight_readable_text:
                (x, y, w, h) = (details['left'][seq], details['top']
                                [seq], details['width'][seq], details['height'][seq])
                boxed_img = cv2.rectangle(
                    img, (x, y), (x+w, y+h), (0, 255, 0), 2)
            # Searches for the string
            if search_str:
                results = re.findall(
                    search_str, details['text'][seq], re.IGNORECASE)
                for result in results:
                    ss_matches += 1
                    if action:
                        # Draw a red rectangle around the searchable text
                        (x, y, w, h) = (details['left'][seq], details['top']
                                        [seq], details['width'][seq], details['height'][seq])
                        # Details of the rectangle
                        # Starting coordinate representing the top left corner of the rectangle
                        start_point = (x, y)
                        # Ending coordinate representing the botton right corner of the rectangle
                        end_point = (x + w, y + h)
                        #Color in BGR -- Blue, Green, Red
                        if action == "Highlight":
                            color = (0, 255, 255)  # Yellow
                        elif action == "Redact":
                            color = (0, 0, 0)  # Black
                        # Thickness in px (-1 will fill the entire shape)
                        thickness = -1
                        boxed_img = cv2.rectangle(
                            img, start_point, end_point, color, thickness)

    if ss_readable_items > 0 and highlight_readable_text and not (ss_matches > 0 and action in ("Highlight", "Redact")):
        highlighted_img = boxed_img.copy()
    # Highlight found matches of the search string
    if ss_matches > 0 and action == "Highlight":
        cv2.addWeighted(boxed_img, 0.4, highlighted_img,
                        1 - 0.4, 0, highlighted_img)
    # Redact found matches of the search string
    elif ss_matches > 0 and action == "Redact":
        highlighted_img = boxed_img.copy()
        #cv2.addWeighted(boxed_img, 1, highlighted_img, 0, 0, highlighted_img)
    # save the image
    cv2.imwrite("highlighted-text-image.jpg", highlighted_img)
    # Displays window showing readable text fields or the highlighted or redacted data
    if show_comparison and (highlight_readable_text or action):
        title = input_file if input_file else 'Compare'
        conc_img = cv2.hconcat([initial_img, highlighted_img])
        display_img(title, conc_img)
    # Generates the text content of the image
    output_data = None
    if generate_output and details:
        output_data = generate_ss_text(details)
    # Prints a summary to the console
    if input_file:
        summary = {
            "File": input_file, "Total readable words": ss_readable_items, "Total matches": ss_matches, "Confidence score": ss_confidence
        }
        # Printing Summary
        print("## Summary ########################################################")
        print("\n".join("{}:{}".format(i, j) for i, j in summary.items()))
        print("###################################################################")
    return highlighted_img, ss_readable_items, ss_matches, ss_confidence, output_data
    # pass image into pytesseract module
    # pytesseract is trained in many languages
    #config_param = r'--oem 3 --psm 6'
    #details = pytesseract.image_to_data(img,config=config_param,lang='eng')
    # print(details)
    # return details
Ce qui précède effectue les opérations suivantes :
- Scanne un tampon d'image ou un fichier image.
- Prétraite l'image.
- Exécute le moteur Tesseract avec des paramètres prédéfinis.
- Calcule le score de confiance du contenu saisi de l'image.
- Dessine un rectangle vert autour des éléments de texte lisibles ayant un score de confiance supérieur à 30.
- Recherche un texte spécifique dans le contenu saisi par l'image.
- Met en surbrillance ou expurge les correspondances trouvées du texte recherché.
- Affiche une fenêtre affichant des champs de texte lisibles ou le texte en surbrillance ou le texte expurgé.
- Génère le contenu textuel de l'image.
- Imprime un résumé sur la console.
def image_to_byte_array(image: Image):
    """
    Converts an image into a byte array
    """
    imgByteArr = BytesIO()
    image.save(imgByteArr, format=image.format if image.format else 'JPEG')
    imgByteArr = imgByteArr.getvalue()
    return imgByteArr

def ocr_file(**kwargs):
    """Opens the input PDF File.
    Opens a memory buffer for storing the output PDF file.
    Creates a DataFrame for storing pages statistics
    Iterates throughout the chosen pages of the input PDF file
    Grabs a screen-shot of the selected PDF page.
    Converts the screen-shot pix to a numpy array
    Scans the grabbed screen-shot.
    Collects the statistics of the screen-shot(page).
    Saves the content of the screen-shot(page).
    Adds the updated screen-shot (Highlighted, Redacted) to the output file.
    Saves the whole content of the PDF file.
    Saves the output PDF file if required.
    Prints a summary to the console."""
    input_file = kwargs.get('input_file')
    output_file = kwargs.get('output_file')
    search_str = kwargs.get('search_str')
    pages = kwargs.get('pages')
    highlight_readable_text = kwargs.get('highlight_readable_text')
    action = kwargs.get('action')
    show_comparison = kwargs.get('show_comparison')
    generate_output = kwargs.get('generate_output')
    # Opens the input PDF file
    pdfIn = fitz.open(input_file)
    # Opens a memory buffer for storing the output PDF file.
    pdfOut = fitz.open()
    # Creates an empty DataFrame for storing pages statistics
    dfResult = pd.DataFrame(
        columns=['page', 'page_readable_items', 'page_matches', 'page_total_confidence'])
    # Creates an empty DataFrame for storing file content
    if generate_output:
        pdfContent = pd.DataFrame(columns=['page', 'line_id', 'line'])
    # Iterate throughout the pages of the input file
    for pg in range(pdfIn.pageCount):
        if str(pages) != str(None):
            if str(pg) not in str(pages):
                continue
        # Select a page
        page = pdfIn[pg]
        # Rotation angle
        rotate = int(0)
        # PDF Page is converted into a whole picture 1056*816 and then for each picture a screenshot is taken.
        # zoom = 1.33333333 -----> Image size = 1056*816
        # zoom = 2 ---> 2 * Default Resolution (text is clear, image text is hard to read)    = filesize small / Image size = 1584*1224
        # zoom = 4 ---> 4 * Default Resolution (text is clear, image text is barely readable) = filesize large
        # zoom = 8 ---> 8 * Default Resolution (text is clear, image text is readable) = filesize large
        zoom_x = 2
        zoom_y = 2
        # The zoom factor is equal to 2 in order to make text clear
        # Pre-rotate is to rotate if needed.
        mat = fitz.Matrix(zoom_x, zoom_y).preRotate(rotate)
        # To captue a specific part of the PDF page
        # rect = page.rect #page size
        # mp = rect.tl + (rect.bl - (0.75)/zoom_x) #rectangular area 56 = 75/1.3333
        # clip = fitz.Rect(mp,rect.br) #The area to capture
        # pix = page.getPixmap(matrix=mat, alpha=False,clip=clip)
        # Get a screen-shot of the PDF page
        # Colorspace -> represents the color space of the pixmap (csRGB, csGRAY, csCMYK)
        # alpha -> Transparancy indicator
        pix = page.getPixmap(matrix=mat, alpha=False, colorspace="csGRAY")
        # convert the screen-shot pix to numpy array
        img = pix2np(pix)
        # Erode image to omit or thin the boundaries of the bright area of the image
        # We apply Erosion on binary images.
        #kernel = np.ones((2,2) , np.uint8)
        #img = cv2.erode(img,kernel,iterations=1)
        upd_np_array, pg_readable_items, pg_matches, pg_total_confidence, pg_output_data \
            = ocr_img(img=img, input_file=None, search_str=search_str, highlight_readable_text=highlight_readable_text  # False
                      , action=action  # 'Redact'
                      , show_comparison=show_comparison  # True
                      , generate_output=generate_output  # False
                      )
        # Collects the statistics of the page
        dfResult = dfResult.append({'page': (pg+1), 'page_readable_items': pg_readable_items,
                                   'page_matches': pg_matches, 'page_total_confidence': pg_total_confidence}, ignore_index=True)
        if generate_output:
            pdfContent = save_page_content(
                pdfContent=pdfContent, page_id=(pg+1), page_data=pg_output_data)
        # Convert the numpy array to image object with mode = RGB
        #upd_img = Image.fromarray(np.uint8(upd_np_array)).convert('RGB')
        upd_img = Image.fromarray(upd_np_array[..., ::-1])
        # Convert the image to byte array
        upd_array = image_to_byte_array(upd_img)
        # Get Page Size
        """
        #To check whether initial page is portrait or landscape
        if page.rect.width > page.rect.height:
            fmt = fitz.PaperRect("a4-1")
        else:
            fmt = fitz.PaperRect("a4")

        #pno = -1 -> Insert after last page
        pageo = pdfOut.newPage(pno = -1, width = fmt.width, height = fmt.height)
        """
        pageo = pdfOut.newPage(
            pno=-1, width=page.rect.width, height=page.rect.height)
        pageo.insertImage(page.rect, stream=upd_array)
        #pageo.insertImage(page.rect, stream=upd_img.tobytes())
        #pageo.showPDFpage(pageo.rect, pdfDoc, page.number)
    content_file = None
    if generate_output:
        content_file = save_file_content(
            pdfContent=pdfContent, input_file=input_file)
    summary = {
        "File": input_file, "Total pages": pdfIn.pageCount,
        "Processed pages": dfResult['page'].count(), "Total readable words": dfResult['page_readable_items'].sum(),
        "Total matches": dfResult['page_matches'].sum(), "Confidence score": dfResult['page_total_confidence'].mean(),
        "Output file": output_file, "Content file": content_file
    }
    # Printing Summary
    print("## Summary ########################################################")
    print("\n".join("{}:{}".format(i, j) for i, j in summary.items()))
    print("\nPages Statistics:")
    print(dfResult, sep='\n')
    print("###################################################################")
    pdfIn.close()
    if output_file:
        pdfOut.save(output_file)
    pdfOut.close()
La image_to_byte_array()fonction convertit une image en un tableau d'octets.
La ocr_file()fonction effectue les opérations suivantes :
- Ouvre le fichier PDF d'entrée.
- Ouvre une mémoire tampon pour stocker le fichier PDF de sortie.
- Crée une base de données pandas pour stocker les statistiques de la page.
- Parcourt les pages choisies du fichier PDF d'entrée.
- Prend une capture d'écran (image) de la page sélectionnée du fichier PDF d'entrée.
- Convertit la capture d'écran (pix) en un tableau NumPy.
- Scanne la capture d'écran saisie.
- Collecte les statistiques de la capture d'écran (page).
- Enregistre le contenu de la capture d'écran.
- Ajoute la capture d'écran mise à jour au fichier de sortie.
- Enregistre tout le contenu du fichier PDF d'entrée dans un fichier CSV.
- Enregistre le fichier PDF de sortie si nécessaire.
- Imprime un résumé sur la console.
Ajoutons une autre fonction pour traiter un dossier contenant plusieurs fichiers PDF :
def ocr_folder(**kwargs):
    """Scans all PDF Files within a specified path"""
    input_folder = kwargs.get('input_folder')
    # Run in recursive mode
    recursive = kwargs.get('recursive')
    search_str = kwargs.get('search_str')
    pages = kwargs.get('pages')
    action = kwargs.get('action')
    generate_output = kwargs.get('generate_output')
    # Loop though the files within the input folder.
    for foldername, dirs, filenames in os.walk(input_folder):
        for filename in filenames:
            # Check if pdf file
            if not filename.endswith('.pdf'):
                continue
            # PDF File found
            inp_pdf_file = os.path.join(foldername, filename)
            print("Processing file =", inp_pdf_file)
            output_file = None
            if search_str:
                # Generate an output file
                output_file = os.path.join(os.path.dirname(
                    inp_pdf_file), 'ocr_' + os.path.basename(inp_pdf_file))
            ocr_file(
                input_file=inp_pdf_file, output_file=output_file, search_str=search_str, pages=pages, highlight_readable_text=False, action=action, show_comparison=False, generate_output=generate_output
            )
        if not recursive:
            break
Cette fonction est destinée à numériser les fichiers PDF inclus dans un dossier spécifique. Il parcourt les fichiers du dossier spécifié de manière récursive ou non selon la valeur du paramètre récursif et traite ces fichiers un par un.
Il accepte les paramètres suivants :
input_folder: Le chemin du dossier contenant les fichiers PDF à traiter.search_str: Le texte à rechercher pour manipuler.recursive: s'il faut exécuter ce processus de manière récursive en bouclant les sous-dossiers ou non.action: l'action à effectuer parmi les suivantes : Surligner, Caviarder.pages: les pages à considérer.generate_output: sélectionnez si vous souhaitez enregistrer le contenu du fichier PDF d'entrée dans un fichier CSV ou non
Avant de terminer, définissons des fonctions utiles pour analyser les arguments de la ligne de commande :
def is_valid_path(path):
    """Validates the path inputted and checks whether it is a file path or a folder path"""
    if not path:
        raise ValueError(f"Invalid Path")
    if os.path.isfile(path):
        return path
    elif os.path.isdir(path):
        return path
    else:
        raise ValueError(f"Invalid Path {path}")


def parse_args():
    """Get user command line parameters"""
    parser = argparse.ArgumentParser(description="Available Options")
    parser.add_argument('-i', '--input-path', type=is_valid_path,
                        required=True, help="Enter the path of the file or the folder to process")
    parser.add_argument('-a', '--action', choices=[
                        'Highlight', 'Redact'], type=str, help="Choose to highlight or to redact")
    parser.add_argument('-s', '--search-str', dest='search_str',
                        type=str, help="Enter a valid search string")
    parser.add_argument('-p', '--pages', dest='pages', type=tuple,
                        help="Enter the pages to consider in the PDF file, e.g. (0,1)")
    parser.add_argument("-g", "--generate-output", action="store_true", help="Generate text content in a CSV file")
    path = parser.parse_known_args()[0].input_path
    if os.path.isfile(path):
        parser.add_argument('-o', '--output_file', dest='output_file',
                            type=str, help="Enter a valid output file")
        parser.add_argument("-t", "--highlight-readable-text", action="store_true", help="Highlight readable text in the generated image")
        parser.add_argument("-c", "--show-comparison", action="store_true", help="Show comparison between captured image and the generated image")
    if os.path.isdir(path):
        parser.add_argument("-r", "--recursive", action="store_true", help="Whether to process the directory recursively")
    # To Porse The Command Line Arguments
    args = vars(parser.parse_args())
    # To Display The Command Line Arguments
    print("## Command Arguments #################################################")
    print("\n".join("{}:{}".format(i, j) for i, j in args.items()))
    print("######################################################################")
    return args
La is_valid_path()fonction valide un chemin entré en paramètre et vérifie s'il s'agit d'un chemin de fichier ou d'un chemin de répertoire.
La parse_args()fonction définit et définit les contraintes appropriées pour les arguments de ligne de commande de l'utilisateur lors de l'exécution de cet utilitaire.
Vous trouverez ci-dessous des explications pour tous les paramètres :
input_path: Paramètre obligatoire pour saisir le chemin du fichier ou du dossier à traiter, ce paramètre est associé à lais_valid_path()fonction précédemment définie.action: L'action à effectuer parmi une liste d'options prédéfinies pour éviter toute sélection erronée.search_str: Le texte à rechercher pour manipuler.pages: les pages à considérer lors du traitement d'un fichier PDF.generate_content: spécifie s'il faut générer le contenu saisi du fichier d'entrée, qu'il s'agisse d'une image ou d'un PDF dans un fichier CSV ou non.output_file: Le chemin du fichier de sortie. Le remplissage de cet argument est contraint par la sélection d'un fichier en entrée, et non d'un répertoire.highlight_readable_text: pour dessiner des rectangles verts autour des champs de texte lisibles ayant un score de confiance supérieur à 30.show_comparison: Affiche une fenêtre montrant une comparaison entre l'image d'origine et l'image traitée.recursive: s'il faut traiter un dossier de manière récursive ou non. Le remplissage de cet argument est contraint par la sélection d'un répertoire.
Enfin, écrivons le code principal qui utilise les fonctions définies précédemment :
if __name__ == '__main__':
    # Parsing command line arguments entered by user
    args = parse_args()
    # If File Path
    if os.path.isfile(args['input_path']):
        # Process a file
        if filetype.is_image(args['input_path']):
            ocr_img(
                # if 'search_str' in (args.keys()) else None
                img=None, input_file=args['input_path'], search_str=args['search_str'], highlight_readable_text=args['highlight_readable_text'], action=args['action'], show_comparison=args['show_comparison'], generate_output=args['generate_output']
            )
        else:
            ocr_file(
                input_file=args['input_path'], output_file=args['output_file'], search_str=args['search_str'] if 'search_str' in (args.keys()) else None, pages=args['pages'], highlight_readable_text=args['highlight_readable_text'], action=args['action'], show_comparison=args['show_comparison'], generate_output=args['generate_output']
            )
    # If Folder Path
    elif os.path.isdir(args['input_path']):
        # Process a folder
        ocr_folder(
            input_folder=args['input_path'], recursive=args['recursive'], search_str=args['search_str'] if 'search_str' in (args.keys()) else None, pages=args['pages'], action=args['action'], generate_output=args['generate_output']
        )
Testons notre programme :
$ python pdf_ocr.pySortir:
usage: pdf_ocr.py [-h] -i INPUT_PATH [-a {Highlight,Redact}] [-s SEARCH_STR] [-p PAGES] [-g GENERATE_OUTPUT]

Available Options

optional arguments:
  -h, --help            show this help message and exit
  -i INPUT_PATH, --input_path INPUT_PATH
                        Enter the path of the file or the folder to process
  -a {Highlight,Redact}, --action {Highlight,Redact}
                        Choose to highlight or to redact
  -s SEARCH_STR, --search_str SEARCH_STR
                        Enter a valid search string
  -p PAGES, --pages PAGES
                        Enter the pages to consider e.g.: (0,1)
  -g GENERATE_OUTPUT, --generate_output GENERATE_OUTPUT
                        Generate content in a CSV file
Avant d'explorer nos scénarios de test, prenez garde aux points suivants :
- Pour éviter de rencontrer l'
PermissionErrorerreur, veuillez fermer le fichier d'entrée avant d'exécuter cet utilitaire. - La chaîne de recherche est conforme aux règles des expressions régulières utilisant le module re intégré de Python. Par exemple, définir la chaîne de recherche sur "organi[sz]e" correspond à la fois à "organise" et "organize".
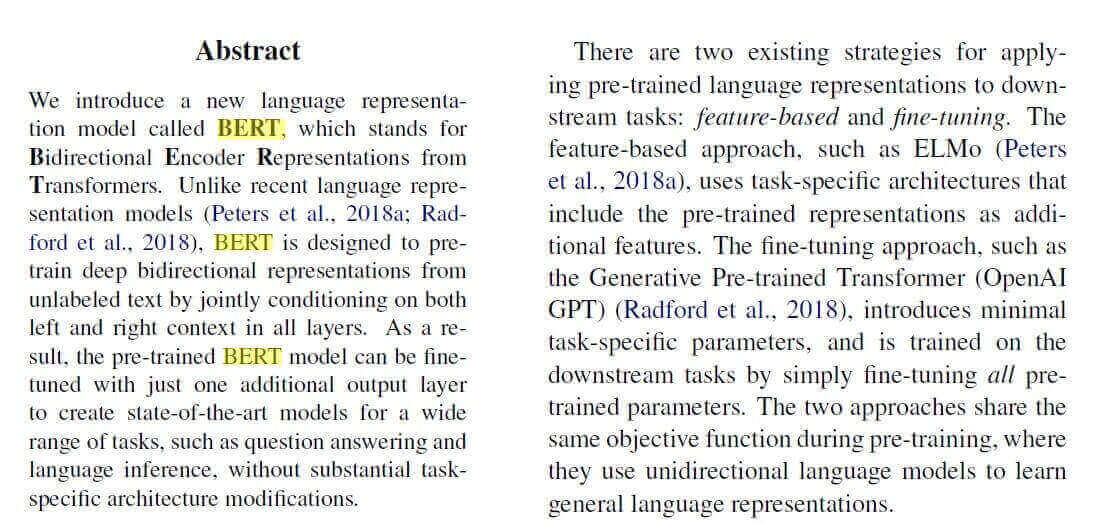
Essayons d'abord d'entrer une image (vous pouvez l'obtenir ici si vous voulez obtenir la même sortie), sans aucun fichier PDF impliqué :
$ python pdf_ocr.py -s "BERT" -a Highlight -i example-image-containing-text.jpgVoici la sortie :
## Command Arguments #################################################
input_path:example-image-containing-text.jpg
action:Highlight
search_str:BERT
pages:None
generate_output:False
output_file:None
highlight_readable_text:False
show_comparison:False
######################################################################
## Summary ########################################################
File:example-image-containing-text.jpg
Total readable words:192
Total matches:3
Confidence score:89.89337547979804
###################################################################
Et une nouvelle image est apparue dans le répertoire courant :
 Vous pouvez passer
 -tou --highlight-readable-textmettre en surbrillance tout le texte détecté (avec un format différent, afin de distinguer la chaîne recherchée des autres).
Vous pouvez également passer -cou --show-comparisonpour afficher l'image d'origine et l'image modifiée dans la même fenêtre.
Maintenant que cela fonctionne pour les images, essayons pour les fichiers PDF :
$ python pdf_ocr.py -s "BERT" -i image.pdf -o output.pdf --generate-output -a "Highlight"image.pdfest un simple fichier PDF contenant l'image de l'exemple précédent (encore une fois, vous pouvez l'obtenir ici ).
Cette fois, nous avons passé un fichier PDF à l' -iargument, et output.pdfen tant que fichier PDF résultant (où toute la surbrillance se produit). La commande ci-dessus génère la sortie suivante :
## Command Arguments #################################################
input_path:image.pdf
action:Highlight
search_str:BERT
pages:None
generate_output:True
output_file:output.pdf
highlight_readable_text:False
show_comparison:False
######################################################################
## Summary ########################################################
File:image.pdf
Total pages:1
Processed pages:1
Total readable words:192.0
Total matches:3.0
Confidence score:83.1775128855722
Output file:output.pdf
Content file:image.csv

Pages Statistics:
   page  page_readable_items  page_matches  page_total_confidence
0   1.0                192.0           3.0              83.177513
###################################################################
Le output.pdffichier est produit après l'exécution, où il comprend le même PDF original mais avec du texte en surbrillance. De plus, nous avons maintenant des statistiques sur notre fichier PDF, où 192 mots au total ont été détectés, et 3 ont été appariés à l'aide de notre recherche avec une confiance d'environ 83,2 %.
Un fichier CSV est également généré qui inclut le texte détecté de l'image sur chaque ligne.
Il existe d'autres paramètres que nous n'avons pas utilisés dans nos exemples, n'hésitez pas à les explorer. Vous pouvez également passer un dossier entier à l' -iargument pour analyser une collection de fichiers PDF.
Tesseract est parfait pour numériser des documents propres et clairs. Une numérisation de mauvaise qualité peut produire des résultats médiocres dans l'OCR. Normalement, il ne donne pas de résultats précis des images affectées par des artefacts, notamment une occlusion partielle, une perspective déformée et un arrière-plan complexe.


Commentaires
Enregistrer un commentaire